Address
304 North Cardinal St.
Dorchester Center, MA 02124
Work Hours
Monday to Friday: 7AM - 7PM
Weekend: 10AM - 5PM
We use cookies to ensure that we provide you with the best possible experience on our site.

Your essential source on Unity and web development

Your essential source on Unity and web development
Today, we delve into the world of Unity and explore the essential Audio Source component along with its companions for effective audio management.
Initially in Unity, components are available to meet our needs in terms of adding music or sound.
Please note that this tutorial is aimed primarily at beginners and covers certain aspects at a superficial level.
Let’s introduce the following functionalities:
Table of contents
Within Unity, when you import an audio file, it undergoes transformation into an AudioClip.
Unity supports various formats such as aif, .wav, .mp3, and .ogg.
In the audio field, it supports mono, stereo and multichannel audio files with up to eight channels.
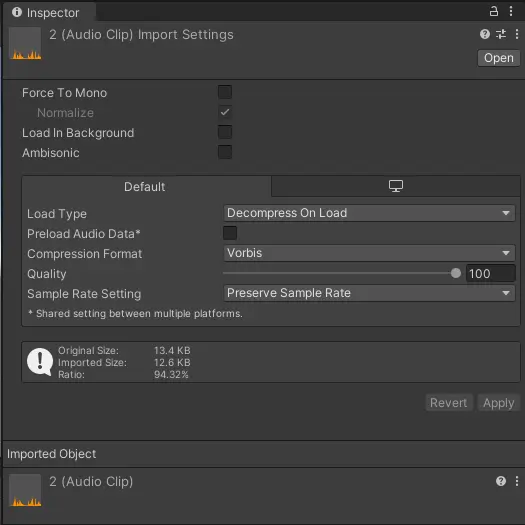
Later, we’ll delve into the diverse configurations of an audio clip.
When it comes to playing audio clips in a Unity scene, you’ll need two essential elements.
The first is to add an Audio Source.
The AudioSource is a component that enables the playback of one or multiple audio clips in your scene.
To play multiple audio clips with a single source, we’ll need to utilize code.
To add an Audio Source, you can:
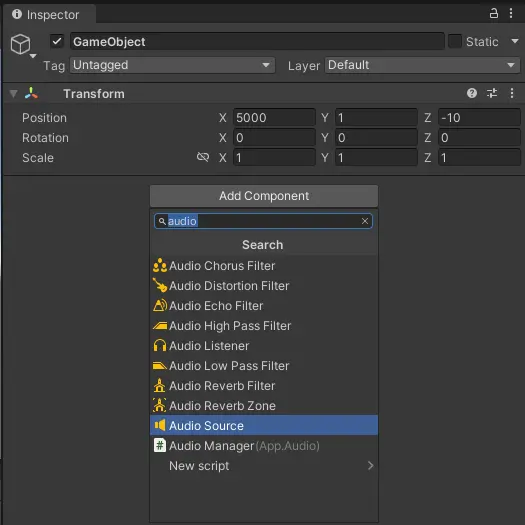
The second essential component for playing sound is having an “Audio Listener“.
By default, it is automatically added to your camera upon scene creation.
Having the listener on the camera is a common practice, as we’ll explore in the “Spatial Blend: Playing Audio with Distance” section where position becomes crucial.
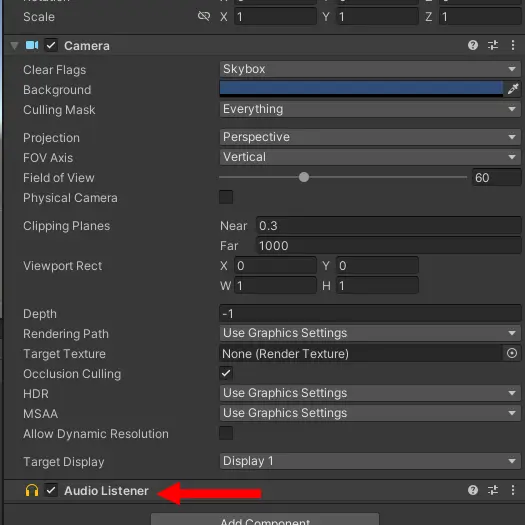
Alternatively, you can manually add an Audio Listener by selecting your gameObject, clicking on Add Component, and choosing “Audio Listener“.
You can play audio either directly through the Inspector or by using code.
By default, the “AudioClip” passed as a parameter will be automatically played, as the “playOnAwake” property is set to true upon component addition.
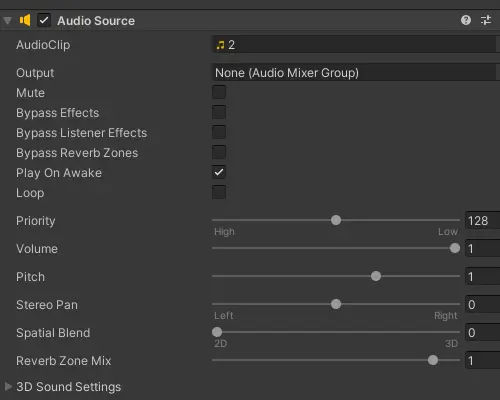
For continuous playback, such as in the case of music, you can also check the “loop” property to make your audio loop.
We can control the playback of our audio using the methods “Play,” “Pause,” and “Stop” of our AudioSource:
using UnityEngine;

namespace App.Audio
{
    public class AudioManager : MonoBehaviour
    {
        public AudioSource audioSource;

        public void Start()
        {
            // Play
            audioSource.Play();

            // Pause
            audioSource.Pause();

            // Stop
            audioSource.Stop();
        }
    }
Simultaneously playing multiple AudioClips is achievable using the “PlayOneShot” method, specifying the AudioClip as a parameter:
using UnityEngine;

namespace App.Audio
{
    public class AudioManager : MonoBehaviour
    {
        public AudioSource audioSource;
        public AudioClip clip;

        public void Start()
        {
            audioSource.PlayOneShot(clip);
        }
    }
In Unity audio Source, the “spatialBlend” property allows you to play a clip in 2D, 3D, or using an value in between.
When the audio source is set to 2D (the default value), the sound will play regardless of the position between the Audio Listener and the audio source.
However, a sufficient volume is still required.
In contrast, when the audio source is set to 3D, the value will utilize 3D settings, decreasing the sound based on the parameters and the distance between the listener and the source.
You can modify the distance by using “Custom Rolloff” or “Linear Rolloff” as the volume rolloff and adjusting the “Min Distance” and “Max Distance” fields.
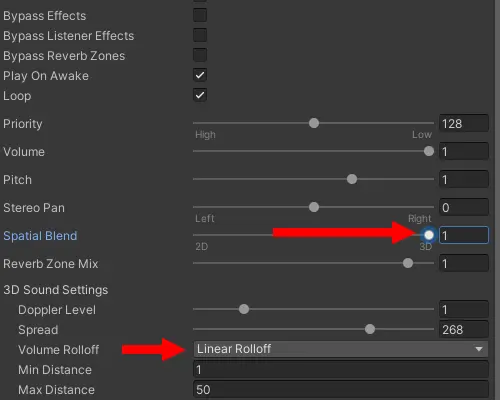
Finally, to avoid creating numerous audio sources for your sounds or altering the position of your audio source, you can play a sound at a specific position using the “PlayClipAtPoint” method:
using UnityEngine;

namespace App.Audio
{
    public class AudioManager : MonoBehaviour
    {
        public AudioSource audioSource;
        public AudioClip clip;

        public void Start()
        {
            audioSource.PlayOneShot(clip, Vector3.one);
        }
    }
Let’s revisit the audio importation process for AudioClips, where you have the option to adjust various settings.
Firstly, you can restrict the audio to use only a single channel with “Force To Mono”.
Another option, “Load in Background,” allows you to avoid saturating the main thread by loading the audio asynchronously in another thread.
This proves highly practical in reducing scene loading times.
Additionally, with the “LoadType” parameter, you can modify the loading method based on your requirements:
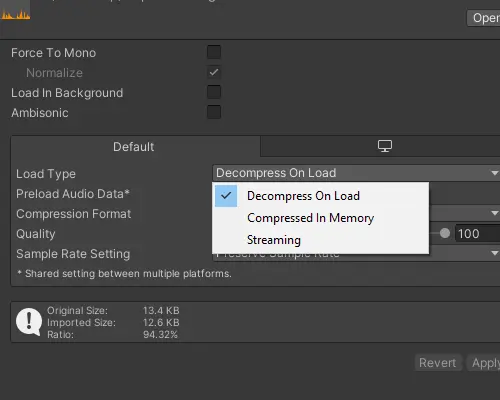
Once your audio is loaded, it is automatically decompressed.
This is particularly useful when a sound needs to be repeated, as the uncompressed audio is stored in memory, resulting in no overhead during gameplay.
Due to potential significant memory usage compared to other methods, it does not recommend using it for large files.
The system compresses the audio in memory and decompresses it during playback.
This method incurs a small overhead but is ideal for memory-intensive clips that cannot use “Decompress On Load.”
The decompression occurs in a separate thread.
It reads and decodes audio directly from the disk in real-time.
For each clip, even if not loaded, streaming clips incur an overhead of approximately 200KB.
Decompression also occurs in a separate thread.
This method is highly effective in further reducing memory usage.
For more detailed information, please refer to the documentation.
To adjust the overall Audio configuration in Unity, navigate to “Edit” -> “Project Settings” -> “Audio.”
All modifications made here will be applied globally to your project, making it perfect for adjusting parameters such as the overall volume of your game.
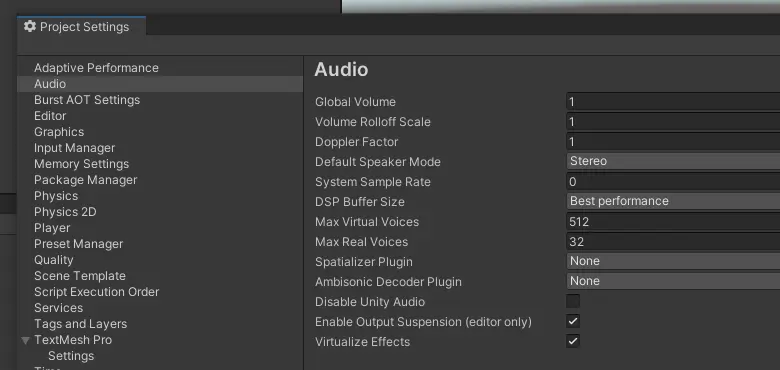
See the documentation for a full description of fields.
To add filters to your sounds, you have two options:
The first is to use components that can be added to the gameObject containing your AudioSource.
These components include:
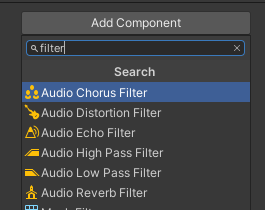
Otherwise, the second option is to create an Audio Mixer, which I find more convenient if you want to reuse the same effects across multiple AudioSources.
To create an Audio Mixer, right-click in your project hierarchy, navigate to “Create” -> “Audio Mixer.”
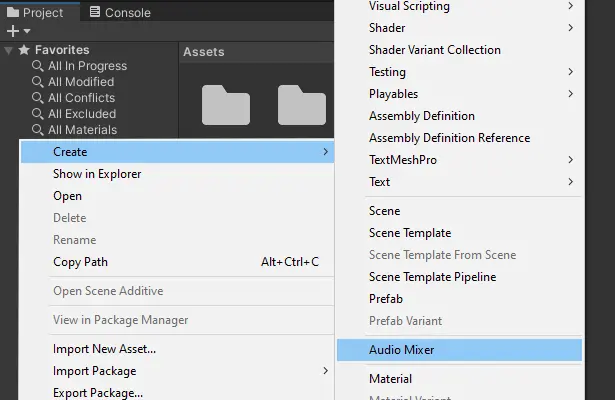
Then, double-click on your Audio Mixer to open the corresponding tab, providing you access to a mixer-like interface.
By clicking the “Add” button, you can incorporate various effects.
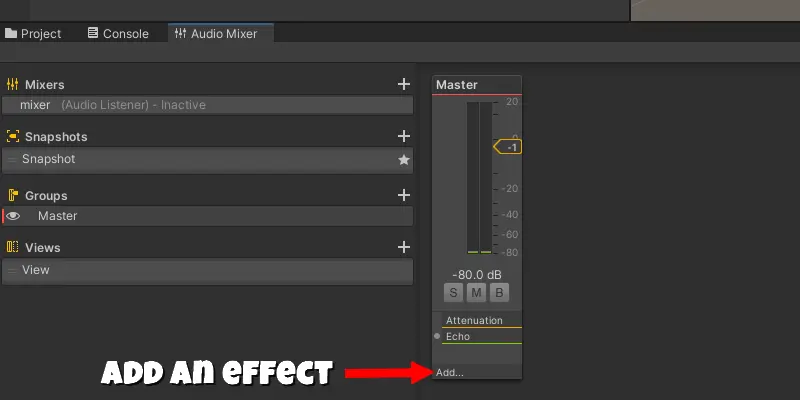
Finally, to apply them to your AudioSource, you need to add your mixer in the output field.

I won’t delve further into details as the Mixer deserves its own article.
This concludes our tutorial on Unity audio source.
Thank you for reading this article. Happy coding!
