Address
304 North Cardinal St.
Dorchester Center, MA 02124
Work Hours
Monday to Friday: 7AM - 7PM
Weekend: 10AM - 5PM
Address
304 North Cardinal St.
Dorchester Center, MA 02124
Work Hours
Monday to Friday: 7AM - 7PM
Weekend: 10AM - 5PM
Your essential source on Unity and web development
Your essential source on Unity and web development
In this article, we will explore various methods to detect input presses in Unity using the Input Manager.
Detecting key presses is crucial for interacting with game elements, such as managing movements, jumps, shots, and many other actions.
Our approach relies on Unity’s default input manager, affectionately called the “old Input system,” known as Input Manager.
While lacking some features compared to the new system (Input System), it remains comprehensive and particularly useful during prototyping.
The main difference between the two lies in their implementation.
The old system relies on a “persistent” listening approach (code in the Update loops), while the new system directly links key presses to actions using events.
If your game involves key customization, I highly recommend Input System.
You will discover how tedious changing keys in-game can be in the Modify Keys In-game section.
To detect a key press, we use Input.GetKeyDown. This function returns true as soon as the user starts pressing a key.
However, it will not return true until the user has released the key and pressed it again.
        using UnityEngine;

        public class InputMonobehaviour : MonoBehaviour
        {
            private void Update()
            {
                // Using KeyCode
                if (Input.GetKeyDown(KeyCode.Space))
                {
                    // Perform a jump, for example
                }

                // Or with a string
                if (Input.GetKeyDown("space"))
                {
                    // Perform a jump, for example
                }
            }
        }
Input.GetKeyUpdetects when a key is released. This function returns true during the frame where the user releases the key.
It will not return true otherwise.
        private void Update()
        {
            if (Input.GetKeyUp(KeyCode.Space))
            {
                // The key is released
            }
        }
We detect a held key withInput.GetKey. This function returns true while the user keeps the specified key pressed.
        private void Update()
        {
            if (Input.GetKey(KeyCode.A))
            {
                // Key A is held, perform an action like shooting
            }
        }
As illustrated in the first example, you can identify a key with a string or the KeyCode enumeration.
Enumeration remains the best choice for the reusability of your code, which will also help you avoid typographical errors.
You can check the complete list of available keys in the Unity documentation.
Caution: Since the 2022.3 version, Unity has enabled the “Physical keys” option.
When using an “AZERTY” keyboard, it directly converts your “AZERTY” keys into “QWERTY” keys.
On an AZERTY keyboard with “Input.GetKey(KeyCode.W)”. The function returns true when you press the “Z” key. You can deactivate this setting in “Edit” → “Project Settings” → “Input Manager.”
Short about the change of Physical keys – Youtube
In the Input Manager, we can create virtual axes.
A unique axis can handle keyboard keys, mouse clicks, and joystick inputs.
To map a virtual axis to multiple types of controllers, you can create another axe with the same name.
The uniqueness of axes is their ability to set a positive and negative button.
When pressing the positive button, the value increases and tends toward 1.0, while when pressing the negative button, the value tends toward -1.0. When there is no key press, the value tends toward 0.0.
Additionally, we can use these axes as virtual buttons without waiting for them to return a value.
You can find all the axes in “Edit” → “Project Settings” → “Input Manager.” An axis has the following main properties:
For the type, the evolution of the value depends on the type of input used. For example:
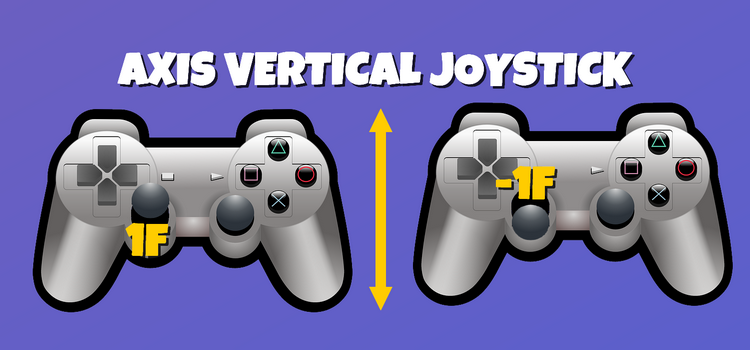
Joystick by OpenClipart-Vectors from Pixabay
Axes are perfect for character movement, and their use is also recommended by Unity (compared to using keys directly) due to their versatility with different types of controllers.
To get the value of an axis, you need to call Input.GetAxis and pass the axis name as a parameter.
This function returns a float.
private void Update()
{
    float speed = 3f;
    // Move right or left, depending on the axis
    transform.Translate(Input.GetAxis("Horizontal") * Time.deltaTime * speed, 0, 0);
}
Please note that if you prefer to retrieve a raw axis value (without smoothing), you can use Input.GetAxisRaw.
According to inputs, the returned value will be either -1.0, 0.0, or 1.0.
The Input.GetButtonDowndetects a pressed virtual button. This function returns true during one frame.
However, it will not return true until the user releases the virtual button and presses it again.
using UnityEngine;

public class InputMonobehaviour : MonoBehaviour
{
    private void Update()
    {
        if (Input.GetButtonDown("Fire2"))
        {
            // Do a second shot, for example
        }
    }
}
The Input.GetButtonUp function returns true during the frame when the user releases the virtual button.
It will return true only during one frame.
using UnityEngine;

public class InputMonobehaviour : MonoBehaviour
{
    private void Update()
    {
        if (Input.GetButtonUp("Fire2"))
        {
            // The key associated with the virtual button Fire2 is released
        }
    }
}
The Input.GetButton detects a held virtual button. This function returns true until the user releases the virtual button.
private void Update()
{
    if (Input.GetButton("Fire2"))
    {
        // The virtual button Fire2 is held, perform an action like shooting
    }
}
I do not recommend using these methods; the new Input System will more easily meet your expectations.
Unfortunately, the screen to modify the key on Unity has been deprecated and removed, so we have to create our own methods.
To use user-defined keys in Input.GetKey, we need to create a system to store user keys.
Below is the code for using “Input.GetKey” with dynamic keys on Unity:
using System;
using System.Collections;
using System.Linq;
using UnityEngine;
using UnityEngine.Events;

public class GetKeySample : MonoBehaviour
{
    public void GetKeyPress(UnityAction<KeyCode> keyCodeAction)
    {
        // You can use async if you prefer
        StartCoroutine(CheckKeyPress(keyCodeAction));
    }

    private IEnumerator CheckKeyPress(UnityAction<KeyCode> keyCodeAction)
    {
        // Get all KeyCode values
        var values = Enum.GetValues(typeof(KeyCode)).Cast<KeyCode>().ToList();

        while (true)
        {
            foreach (var keyCode in values)
            {
                // Check one by one if a key is pressed
                if (Input.GetKeyDown(keyCode))
                {
                    keyCodeAction.Invoke(keyCode);
                    yield break;
                }
            }

            yield return null;
        }
    }

    private void Start()
    {
        // How to use
        GetKeyPress((KeyCode keyCode) =>
        {
            // We can bind keyCode to an action
        });
    }
}
This class is a prototype; I think this class would be more usable as a static class without extending MonoBehaviour.
Here, we use PlayerPrefs to store our key preferences.
PlayerPrefs store data locally per machine.
Nothing prevents you from evolving this class to store them on a web server:
using System.Collections.Generic;
using UnityEngine;

public class KeyBinder
{
    // Define all your actions
    public enum Control
    {
        ACTION,
        PARAMETERS,
        MAP
    }

    // Default values can be created in different ways...
    private static Dictionary<Control, KeyCode> _defaultValues = new Dictionary<Control, KeyCode>()
    {
        { Control.ACTION, KeyCode.A },
        { Control.PARAMETERS, KeyCode.Escape },
        { Control.MAP, KeyCode.M }
    };

    // Cache for performance
    private static Dictionary<Control, KeyCode> _keysStored = new Dictionary<Control, KeyCode>();

    public static KeyCode GetKeyCode(Control control)
    {
        // Cached value
        if (_keysStored.ContainsKey(control))
        {
            return _keysStored[control];
        }

        if (PlayerPrefs.HasKey(control.ToString()))
        {
            var value = (KeyCode)PlayerPrefs.GetInt(control.ToString());
            _keysStored.Add(control, value);
            return _keysStored[control];
        }

        // Not configured yet, return the default value
        return _defaultValues[control];
    }

    public static void UpdateKeyControl(Control control, KeyCode keyCode)
    {
        // Remove from cache
        if (_keysStored.ContainsKey(control))
        {
            _keysStored.Remove(control);
        }

        // Update the value
        PlayerPrefs.SetInt(control.ToString(), (int)keyCode);
        PlayerPrefs.Save();
    }
}
We use the custom “KeyBinder.GetKeyCode” method to retrieve the key associated with our action.
Then, we use “Input.GetKeyDown” to detect a key press.
using UnityEngine;

public class UseKeyBinder : MonoBehaviour
{
    private void Update()
    {
        // Use configured keys
        if (Input.GetKeyDown(KeyBinder.GetKeyCode(KeyBinder.Control.ACTION)))
        {
            // Do something when the ACTION key is pressed
        }
    }
}
This system is very flexible and allows you to manage game keys dynamically.
Regarding dynamic axes, it’s another story; we don’t have access to the virtual axes stored in the editor, so we have to create our own axes and replicate their functionality in a new class.
Unfortunately, it is not possible to directly detect the pressure applied to a joystick.
Therefore, all values returned by our customized function will follow the behavior of a regular key and use “sensitivity” to vary the value.
Once again, I recommend switching to the Input System instead of using this code.
using System.Collections;
using System.Collections.Generic;
using System.Linq;
using UnityEngine;

public class InputMonobehaviour : MonoBehaviour
{
    // Enum, for detecting which button is pressed
    // Bit field, but we don't need FlagsAttribute because we only use POSITIVE (10) AND NEGATIVE (01)
    public enum PressButton
    {
        NONE,
        POSITIVE,
        NEGATIVE,
        BOTH
    }

    // Recreate a class similar to Virtual Axis Configuration (It will be better as ScriptableObject)
    public class InputAxis
    {
        public string name;

        public float sensitivity;

        public float gravity;

        public KeyCode negativeKeyCode;

        public KeyCode positiveKeyCode;
    }

    // Let's make it a singleton
    public static InputMonobehaviour Instance { get; private set; }

    private void Awake()
    {
        Instance = this;
    }

    private void Start()
    {
        // Init for sample, ScriptableObject will be better
        // I use static keys for sample but all keys can be changed at runtime.
        _inputAxes = new List<InputAxis>()
        {
            {
                new InputAxis()
                {
                    name = "Vertical",
                    gravity = 3f,
                    sensitivity = 3f,
                    negativeKeyCode = KeyCode.DownArrow,
                    positiveKeyCode = KeyCode.UpArrow
                }
            }
        };
    }

    // Store current axis values
    private static Dictionary<string, float> _axisValues = new Dictionary<string, float>();

    // Store InputAxis in List
    private List<InputAxis> _inputAxes = new List<InputAxis>();

    // This function will replace Input.GetAxis
    public static float GetAxis(string name)
    {
        var axisInput = LoadInputAxis(name);

        // Add key
        if (!_axisValues.ContainsKey(name))
        {
            _axisValues.Add(name, 0f);
        }

        var value = _axisValues[name];

        // Check which button is pressed
        var pressValue = IsPressPositive(axisInput, value);

        // Positive or negative value?
        var sign = Mathf.Sign(value);

        // Nothing is pressed, gravity is applied
        if (pressValue == PressButton.NONE)
        {
            _axisValues[name] = Mathf.Clamp01(Mathf.Abs(value) - Time.deltaTime * axisInput.gravity) * sign;
            return _axisValues[name];
        }

        // Same value is applied in each direction, nothing moves
        if (pressValue == PressButton.BOTH)
        {
            return value;
        }

        var signToFocus = pressValue == PressButton.POSITIVE ? 1f : -1f;

        // It always snaps values, missing a configuration (condition check if the direction has changed)
        if (value != 0 && sign != signToFocus)
        {
            _axisValues[name] = 0f;
            return _axisValues[name];
        }

        _axisValues[name] = Mathf.Clamp01(Mathf.Abs(value) + Time.deltaTime * axisInput.sensitivity) * signToFocus;
        return _axisValues[name];
    }

    private static PressButton IsPressPositive(InputAxis inputAxis, float value)
    {
        // We use PressButton as a field Bit, so we can use bit operations
        PressButton pressPositiveValue = Input.GetKey(inputAxis.positiveKeyCode) ? PressButton.POSITIVE : PressButton.NONE;
        PressButton pressNegativeValue = Input.GetKey(inputAxis.negativeKeyCode) ? PressButton.NEGATIVE : PressButton.NONE;

        return pressPositiveValue | pressNegativeValue;
    }

    private static InputAxis LoadInputAxis(string name)
    {
        return Instance._inputAxes.Single(x => x.name == name);
    }
}
We use the custom “GetAxis” method to retrieve the value of our axis.
private void Update()
{
    float speed = 3f;
    // Use it like that
    transform.Translate(GetAxis("Vertical") * Time.deltaTime * speed, 0, 0);
}
This class is incomplete and has some shortcomings in terms of features and performance.
To briefly explain the code, which may seem complex at first glance: Mathf.Clamp01(Mathf.Abs(value) + Time.deltaTime * axisInput.sensitivity) * signToFocus;
I hope this article has been able to introduce you to new things.
Main image by sergeitokmakov